
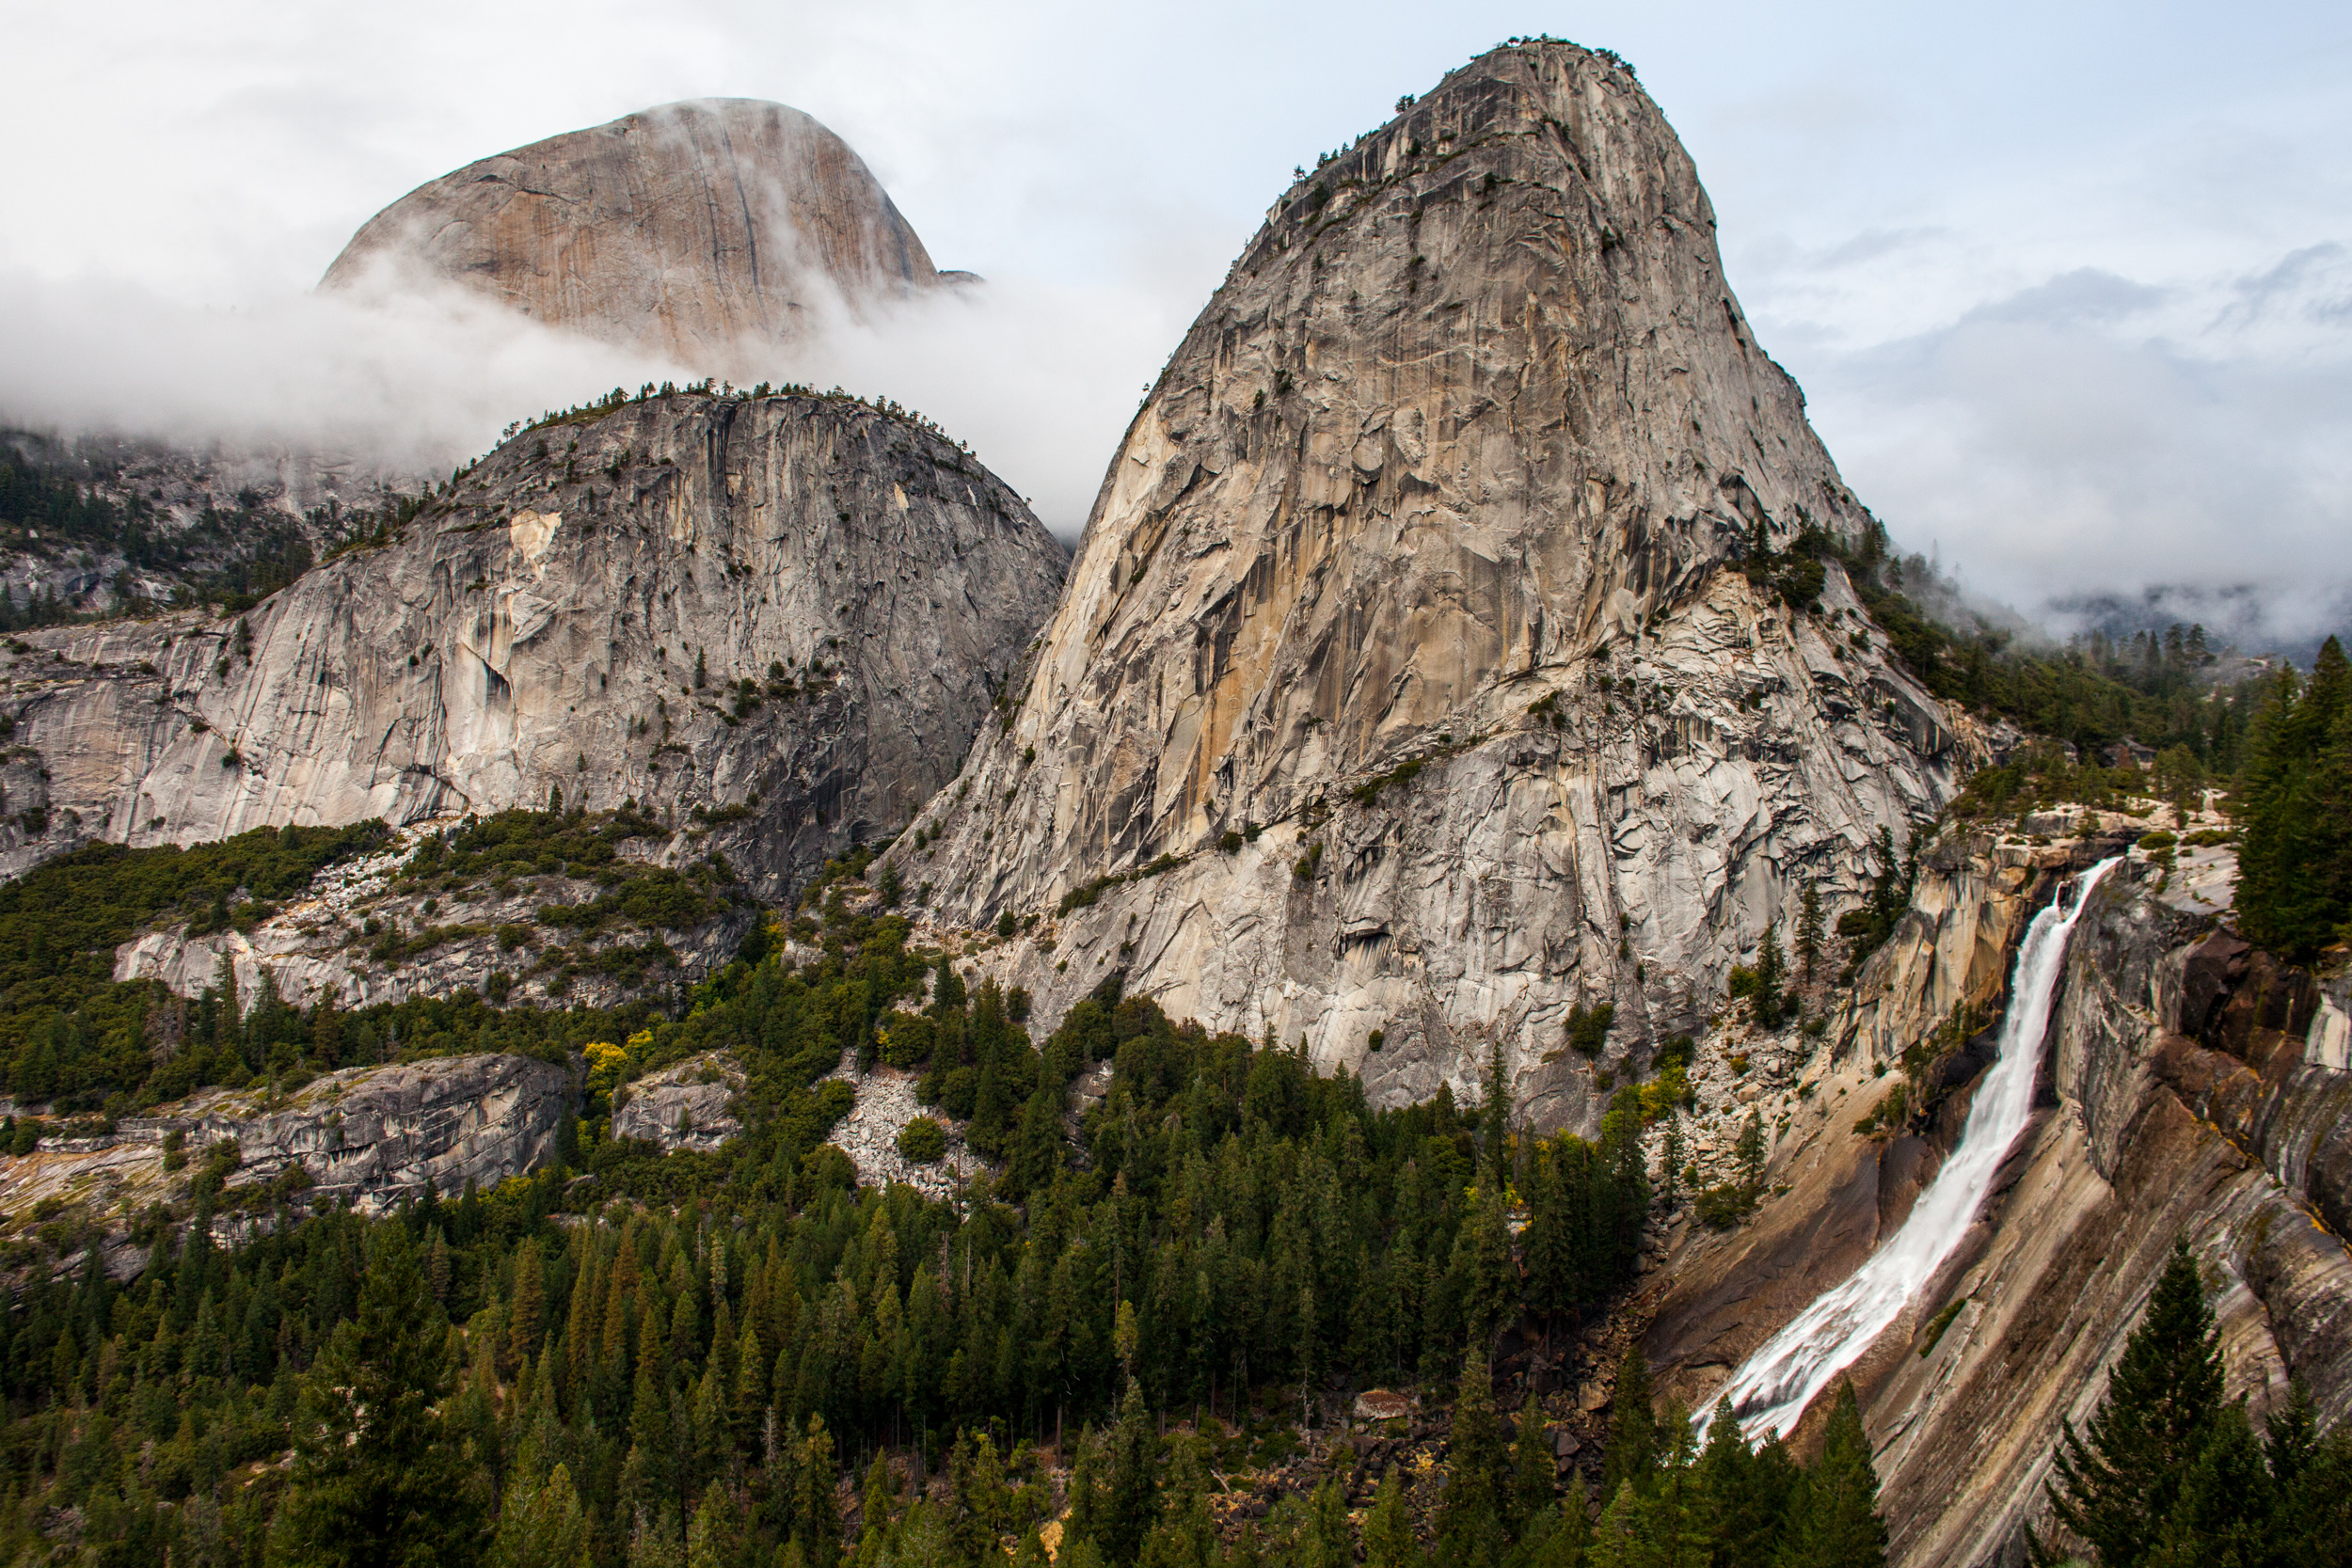
Situated between Mt. Broderick and Nevada falls on the JMT is a 2000ft gem called Liberty Cap. The aesthetics of this bell shaped, granite monolith seems to call to climbers to come explore it’s many features. The first ascent of the wall was done by a notorious crew of Warren Harding, Galen Rowell and Joe Faint some 40+ years ago and new ascents are still going up in this modern age. A few have been slotted in on my must do list and I recently had the opportunity to climb one of the newer free aid line routes called Scarface. This route was put up as an aid line in 2010 by S.Bosque and J.Mucci and received an all free ascent in 2013 by L. Stefurak.
Liberty Cap gets plenty of sun throughout the year and during these long and hot summer days early morning starts seem prudent, as well as water, and sun protection. My partner, Susie Christensen, and I rose before dawn and set out on the Mist Trail to the top of Vernal Fall and across the Merced to a climbers trail which leads off into the woods from where the main trail turns hard right heading up towards Nevada Fall. It’s easy to pass this trail up and no worries as it’s easy enough to keep going until the main trail comes into contact with the base of Liberty Cap. The approach took us approximately 2 hours walking a nice, predawn pace. Uber-psyched parties could blast up there faster of course.
Scarface is on the far left side of the west face and is accessed by following the climbers trail along the base for a little ways and then down and around to the left. If you’ve ended up in the notch between Broderick and Liberty Cap you have gone too far. The route climbs the obvious white rock scar which is accessed to the left of a large ramp system on the right.
The topo in the new Yosemite Big Walls guide is pretty on point. The following is a brief breakdown of beta.
Rack: 1 Green C3, 2 Red C3, 2 Green Alien, 3 Yellow Alien, 1 Yellow Grey offset Alien, 1 Grey Alien
2 each #.5 camalot to #2 camalot
1 each #3, #4 camalot.
It’s a lot of finger sizes and they are necessary.
60m rope is plenty if topping out otherwise a 70m is needed if you rappel.
P1: 5.11 Some broken and grassy ledges from the ground lead you up into stemming and lay backing corner until it thins out and a bolt is reached. Move left into another corner and to another bolt. Some interesting stemming leads you up to an ant tree and the belay on the left.
This pitch was full of dirt and the nut tool was useful to clean out finger locks and gear placements.
P2:5.10c/d From the belay move up and right pulling over a bulge in the crack. Pass a small ledge with some tat and a belay and keep climbing the lieback through where crack gets wider employing more liebacking and eventually belaying at a good stance with a tree.
P3: 5.10d This pitch continues with liebacking until an awkward mantle to obtain standing on a small stance. Continue up through some trees and broken ledges and be mindful of loose rock! One can sling the tree if they want, but it’s not necessary. Move right onto an unprotected face to gain the large ledge with a 2 bolt anchor.
P4:5.10b Start to the right of the bolted belay up blocky terrain to a series of short cracks. The rock quality gets crumbly and friable. Take the best path through this zone so as to avoid loose rock and end at a bolted belay.
P5: 5.12 This is the first crux pitch and in my experience the harder of the two. You can leave the big gear with your partner and take all of the finger sizes and singles to a #1.
Climb up some grainy rock clipping two bolts, avoiding the loose rock to the left. You will move into a short corner on your right where there is a pancake like flake that you will climb up. You can get a .75 higher up buried deep in one of the pods. Mantle onto a nice ledge below the third bolt. From here you will move left into the crack. I used some crimps on the face and moved my feet onto a nice edge where the crack begins. There is a large foot rail out and right a little higher up, this offers a great rest. From there you work your way of the right leaning crack, liebacking, smearing, heel hooking and eventually pulling into it to stand on the offset rail. It’s rattly fingers through here and eventually thins down again at tight fingers before opening back up close to the end. Belay at two bolts on a small ledge.
P 6: 5.10c/d This pitch starts with good hand jams in good rock until you move left into another flake with grainy rock. Tight hands will bring you to a rest and a bolt. There are loose blocks here, and tread lightly! From here the line is very straight forward – fist jams, some arm bars, and a little bit of liebacking take you through this widish pitch to a good belay ledge. Bump your 3 and 4 if you only brought 1 of each.
P 7: 5.10d Climb up the wide crack to the right until you can move onto the face/slab below the first bolt with a black hanger. To the right is the original aid line – do not follow those bolts and rivets. Employ edging skills and mantles to get yourself established on the upper slab. There are some nice rails to use for feet and hands to get you there. Don’t let the slab intimidate you as there are plenty of good edges that will bring you to the crack above. The crack takes good gear as you move left along it to another short section of liebacking which will bring you to a two bolt belay below the next crux pitch. You can also place gear in the right to position yourself more on the corner on a good stance.
P 8: 5.12 Bring your finger sized pieces and #2, #3. From the belay lieback your way up the steep dihedral. Good locks, good smears with some edges and great gear will bring you to a stance above a bulge. Grab a rest and then continue up employing the same technique as before until you reach a bolt. The crack tapers out but there are a few tiny pods that can be useful This is the crux of the pitch and involves a left foot on an undercut rail, a good hold, and either a long reach or sow stemming. I used all of the above and was granted with a great hold before moving left into some flakes and another crack. Make your way up right to a two bolt belay.
P 9:5.11a This was a great pitch which involved some stemming, balance, and slab climbing. One bolt and some thin gear will get you to the belay ledge with two bolts. This is the last point you can rappel from.
P 10:5.10a/b From here it turns a little adventurous and your route finding skills will be useful. From the belay climb up to a small roof that is directly above the belay. Traverse under this and up the crack until you are on a ledge with some bushes. From here you will climb the seam. There is a large pod which takes a #3 and a couple of smaller pieces can be placed higher. Continue up the seam at 5.10 until you reach a ledge covered in manzanita. Continue straight up various low angle cracks and aim for a shiny bolt. Climb on the right side of the bolt slicky stemming up to a good rail. A few more easy moves lead to a ledge. Belay at a manzanita.
P11: 5.10a/b Climb up to a short “chimney”. Use a thin flake on the right which becomes a hand crack until it pinches down then you will move left into an steep and semi-wide dihedral. There is some vegetation as well as poor quality rock around. Undercling across a small roof and gas it past a tricky section. Face climb up to the right, past occasional cracks towards a clump of bushes. Here you have two options – you can pass the bushes on the right side to access a small ledge with a large tree on the right and belay here or you can take the original aid line up to a large roof and traverse left using huge foot rails. There is a fixed #3 at the end of this roof. Climb wither the bushes or the crack and the slab and belay at a stance just below a small pine tree. I took the later option which I enjoyed.
P12: 5.9
If you went left on the previous pitch then from the stance belay you will climb up and right into a mossy tieback. The climbing is really easy and the gear is great. Move onto a series of blocks and meet up with the righthand variation. Make your way up more small blocks and ledges and trees and follow the path of least resistance to the summit. Its a rope stretcher so use slings on your gear. Tread lightly as it is sandy and loose.
Scramble to the true summit for another 300 feet or so. This is an epic view of the South Face of Half Dome and Little Yosemite Valley. The descent follows a path of least resistance down the backside of Liberty Cap – a climbers trail will eventually take you down to the hikers trail close to Lost Lake (which is currently dry), eventually this meets back up with the JMT and you will descend down the Mist Trail.
Wear a helmet and bring plenty of water. The route is in the shade until noon. Many of the pitches climb quickly.